return to section
December 7, 2018
2557
“A dog is man’s friend,” said one of the greats. He was right, but what to do when your pet breaks the leash, rushes at passers-by and destroys the house? How to raise a four-legged pet? How to correct his behavior and wean him from bad habits?
Read more about this in our special material...
What is the “Controller” leash by Antoine Najarian
The problem that most dog owners face did not go unnoticed by Antoine Najarian. The search for ways to solve this problem led the specialist to create a special leash that combined the functions of a regular and strict collar for training dogs. In the process of re-educating the animal, the need arose to invent a means capable of controlling its behavior. This is how the “Controller” (leash-collar) appeared.
Antoine Najarian is not just a dog handler. He is a specialist in the education and re-education of dogs, their friend and psychologist. He's not used to hurting animals. At the same time, the specialist believes that the dog should not feel like the master of the house, which means that to correct its behavior, moderate force can be used, which is closest to the natural behavior of animals in a pack.
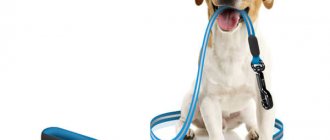
Externally, the leash is a thin eight-millimeter nylon cord, the length of which is about three meters. On both sides of the cord there are two soldered rings of different diameters and two clamps, with which you can adjust the tension of the collar. The Controller collar leash is so strong that it can withstand a load weighing 500 kg. This is more than enough to hold even large breed animals in place.
It is enough to slightly pull the leash, and the dog will immediately feel what the owner requires of him.
Malfunctions and repairs of electronic collars
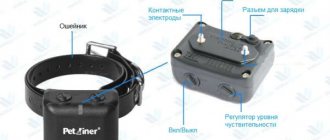
Most often, electronic collar receivers fail, which is not surprising, since remote controls are just radio signal transmitters to the collar. It is the receiver (signal receiver) that does the main work of raising the dog: warning with sound or vibration and correction with electric discharge.
If you bought an electronic training collar and it doesn’t work, then read the instructions carefully - 90% of “faulty” models begin to magically work after successfully matching the remote control and the receiver. The fact is that most models use the technology of matching the transmitter and receiver of signals by encoding at a random frequency. This is done in order to exclude the possibility of influencing another dog wearing the same collar.
If the model uses replaceable power sources (batteries), then first of all you need to replace the batteries in the remote control and receiver. In most cases, models come with the simplest and cheapest test batteries, which are unknown when and by whom they were released.
If the Anti-Bark collar does not work on your dog, then you need to carefully read the instructions and the article “First use of the Anti-Bark collar.” Please note that some models of Anti-Bark collars with a vibration sensor, and even more so with double (vibration + sound) or triple (vibration + sound + software settings) bark detection detection, are very difficult to check without the object of use, that is, a dog. Therefore, if you were unable to wake up the sleeping device in your hands after adjusting the response sensitivity, fully charging the battery or replacing the batteries, then still try to put the collar on the dog and provoke it to bark.
The main malfunctions are as follows:
- Failure of the position sensor, which turns on the receiver whenever the dog moves.
- Oxidation of the contacts of the position sensor - with this malfunction, the receiver can only be activated by shaking it, and quite vigorously.
- Burnout of internal elements of the microcircuit. For example, when using more affordable 12 volt batteries instead of 4LR44 (6 volt) batteries.
- Oxidation and damage to the integrity of contacts at soldering points when moisture gets into the receiver after swimming.
- The firmware (control program) of the controller “flies”.
- Banal falling off of conductors due to poor-quality soldering. As you know, in electronics the first place is occupied by two main causes of breakdown: there is a contact where there should not be one and there is no contact where it is needed. So these malfunctions are in first place among the reasons for failure of receivers.
- The power of the electric discharge on the receiver is reduced until it is completely absent
- And finally, the impossibility of matching the remote control and the receiver.
Replacing failed batteries in battery models, repairing and replacing position sensors, vibration motors, restoring static discharge, etc. will cost dog owners much less than purchasing a new receiver or model. For example, repairing a receiver of the popular Axcel Fox PT-100 model will cost us 300 rubles. Repair of any other models is carried out only after diagnostics and mandatory agreement on the cost of repairs with the customer.
Diagnostics of malfunctions of electronic collars in the USA, Czech Republic and South Korea costs 200 rubles, repairs - from 300 rubles. In any case, the cost of repairs will not exceed 30% of the cost of the receiver or remote control for models made in China, the USA, the Czech Republic and South Korea. We do not guarantee that we can repair any collar, but our specialists will try to help you as much as possible. It is also possible to exchange an old imported electronic collar for a new one from our range, with the cost of the old device offset.
How to properly put a collar on a dog?
It is not enough to simply buy a collar and leash and expect that your dog will immediately begin to obey. In order for a walk to bring only positive emotions to both the owner and the animal, you need to learn how to put on a collar. To do this, you can use step-by-step instructions:
- Take the leash in your hands and lay it out in the shape of the letter “P”, so that the metal lock is on the left.
- Tighten the “Controller” collar leash around your neck. You can check the correct tension using your middle finger: it should fit easily between the collar and the animal’s neck. If the tension is not strong enough, the metal clamp will slide forward, and the owner will no longer be able to control the dog’s behavior.
- The correct position of the collar is the highest point of the neck, just behind the ears.
With the help of such a leash it will be easier to control large and heavy dogs, as well as medium-sized animals.
Advantages over other leashes and collars
The “Controller” has the following advantages over other leashes and collars:
- unlike a strict collar, the possibility of injury to the dog is eliminated;
- a special metal clamp allows you to hold the collar on the most sensitive area of the neck;
- there is no need to constantly adjust the collar, since it does not slip and always remains in the place where it was secured;
- lightweight, convenient and mobile. Thanks to the second lock, the leash can be attached to your belt, to the handle of a bicycle, etc. Thus, while walking, your hands can be completely free.
With the help of the Controller leash-collar, the dog owner can easily and painlessly correct the animal’s unwanted behavior.
How it works and what are its advantages
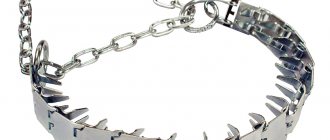
The “Controller” leash-collar was invented in 2013 by experienced dog breeder and trainer Antoine Najarian, who is convinced that “dogs obey only leaders.” It helps solve all problems with your pet, helping to control the dog without injuring it, unlike studded “strict” models. In addition, even a fragile girl can handle the collar, because a slight tug is enough for the dog to understand you. When walking with such a leash, the dog is more obedient, follows commands more easily, is concentrated and not aggressive.
The controller is not only a collar, but also a leash. A high-quality retainer helps to hold the dog, because it is located in the most sensitive place of the neck. Thanks to the strong fastening, the leash will not slip out of its place no matter what your pet does. The second part of the leash is attached to a stroller, belt, bicycle or other dog for a convenient walk. Veterinarians recommend this leash for teaching and training large dogs, such as the Italian Cane Corso (you can learn more about the breed on the specialized website “All about Cane Corso” https://cane-corso.online/).
DIY leash-collar “Controller”
You can make a “controller” (collar) yourself using a regular nylon rope of the required thickness. To do this, you need to make a slip knot at one end of the cord. It will serve as a retainer. This means that the pull will tighten the knot around the dog's neck. But in order to make the leash-collar safe for the animal, that is, to eliminate the possibility of suffocation, it is necessary to measure the approximate circumference of the dog’s neck and make an ordinary strong knot. This way, when the collar is tightened, a strong knot will stop the rope from moving.
After this, thread the free edge of the cord into a slip knot and put the collar on the animal’s neck so that the lock is behind the ears.
Terms of use
Control collars are often purchased for large breed dogs. Such animals are more difficult to control when walking due to their heavy weight. The leash allows you to stop the dog with one movement of the hand and indicate the primacy of the person. When used correctly, the pet quickly understands what the owner requires of him. And tasty rewards will reinforce healthy habits.
Put the collar on immediately before going for a walk. In this case, the dog will readily stick his neck out, knowing that he will soon go outside. The donning algorithm is simple:
- Lay out the leash on a flat surface in the form of a loop with a lock on the left side.
- Place it around the dog's neck, securing it in the upper area of the neck, just below the ears.
- Make sure there is some space between the cord and the body.
Leash-collar “Controller”: reviews from dog owners
Antoine Najarian's original invention, “Universal leash-collar for controlling, training and re-educating dogs,” has collected hundreds of positive reviews from the owners of these four-legged animals. Most of them are as follows:
- a truly effective management tool;
- requires minimal effort to achieve maximum positive results;
- with one leash you can lead two dogs at once;
- Just a slight tug on the leash is enough for the dog to understand what is wanted of it;
- Walking brings real pleasure.
How to sew a “Controller” yourself?
In order to significantly save money, you can build this protective device using a regular nylon cord. To do this, you need to acquire a special rope of the required length and thickness.
One end of the rope should be tied in a knot that will slide. It is this end that will serve as a one-way lock. Consequently, this will mean that when pulling, the knot will be tightened and the dog will feel some discomfort.
In order for everything to be sewn correctly, it is worth calculating the length of the rope so that the dog does not suffocate during training. After everything is correctly made, it is necessary to place the device in such a way that the fixing unit is located exactly in the area behind the animal’s ears.
To summarize the article, it should be noted that such a means of training pets as the “Controller” collar is one of the most effective. This is primarily due to the fact that the noose cannot cause any harm to the pet at all, nor can it injure it during training.
Once your pet understands what exactly is required of him, your walks together will only bring pleasure to both your dog and you.


