Every dog living in the yard of a private house needs a reliable shelter that will protect them from bad weather and help them stay warm on a cold winter night. A do-it-yourself dog house will not require much time from you, nor a large amount of materials, nor outstanding builder skills.
We would like to offer you a simple project for an insulated dog house, in which we will show you step by step how to build a decent home for your four-legged friend. You can even involve your children in this work and have fun together doing something necessary and interesting!
Insulated dog house: drawings.
There are many ways to build an insulated dog house, but we will focus on just one of them.
This method combines two techniques at once that make the booth warm. 1.
Firstly, it is divided into two rooms, one of which will become the main warm “room” for the dog, and the other will act as a vestibule - a buffer zone between the main room and the cold environment.
2.
And secondly, the walls of the main compartment are made double. The air gap between them will significantly reduce heat loss, and the animal will be able to quickly heat a small space inside the booth with its body heat.
Our kennel is designed for medium-sized dogs (up to 50cm at the withers). If your pet is much larger or, on the contrary, smaller, then it may be worth proportionally increasing or decreasing the size of the booth to make the dog comfortable.
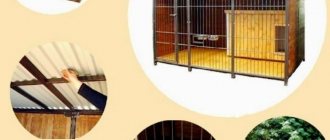
Another design trick that is worth resorting to is a removable roof.
You can make it open like a chest lid - all you need is a couple of hinges. But a booth with such a roof can be easily cleaned if necessary.
Do-it-yourself dog house: stages of work.
The first thing to do is cut out all the necessary parts according to the plan. Don't forget that in addition to plywood, you will also need 80x40 timber. In addition, if you use a circular saw, remember that when marking, you should take into account the thickness of the blade you will be cutting with.
Then assemble the structure by attaching the plywood to the beams with self-tapping screws.
Assembling a booth from ready-made parts does not take much time. All we have to do is install the internal partition and roof.
We also installed a double floor in the main room to minimize heat loss.
Assembling the roof.
And our booth is actually ready.
If the dog is going to spend the winter in this kennel, then it makes sense to fill the space between the plywood sheets with insulation. Insulation can also help keep the kennel cooler during the summer months. However, you should not use vapor-permeable insulation like mineral wool, as they can absorb moisture in the off-season, which can reduce their effectiveness to zero.
Use solid vapor-tight insulation, such as extruded polystyrene foam. It is sold in sheets of various thicknesses, and is absolutely not afraid of moisture, so it does not lose its properties in wet weather. With its help, you can insulate not only the walls, but also the floor and roof of the booth.
When installing, it is advisable to tilt the roof slightly towards the rear wall so that water drains from it.
Obviously, the plywood on the roof will quickly get wet and become unusable, so you need to cover it with any roofing material that you have on hand: anything from roofing felt to metal tiles will do. It's time to use the remains from the roof of your house or garage.
That's all! The booth is ready to move in. For beauty, you can cover the outside with clapboard.
Important!
And the last small but very important detail: try to raise the booth above the ground. You can attach legs to the bottom or simply place it on bricks, but in any case, provide some clearance between the floor and the ground. This will not only help the dog dry and warm in cold weather, but will also extend the life of the kennel, because its bottom will not be exposed to excessive moisture.
The design and construction of a booth begins with determining its dimensions. To calculate the length, width and height, you need to answer two questions that will help you determine the basic dimensions:
- Who are we building for?
If the building is intended for one or two dogs, then it is best to design a partition that will divide the space into two zones. If there are a large number of dogs (more than three), it is recommended to build several kennels for each pair of animals or for each individual individual. - Sizes of residents
There are three types of dogs based on height: small, medium and large. It is not advisable to build a huge doghouse for a small dog, since a large space will be difficult to heat in winter, and the animal will constantly freeze.
For example, let's take a booth in which one dog will live. First you need to take “measurements” from the animal. To do this, use a regular tailor's meter (flexible tape with centimeter divisions). For the data obtained to be correct, the dog must stand still.
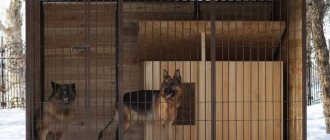
Outdoor enclosure for dogs. The most common mistakes of builders.
You should know that sandy and sandy loam soils are most favorable for equipping an enclosure; they absorb water well after rain, allow air to pass through, and dry quickly.
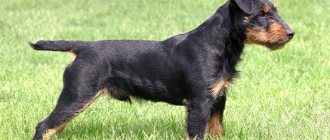
The worst ones will be clayey, silty, which remain damp for a long time. Jagdterriers cannot live indoors. Without receiving proper physical and emotional relief, the dog becomes extremely nervous. She requires regular walks or active hunting.
Brushing is required once a week. Equipment for keeping a Jagdterrier. Jagdterriers can be kept in the yard, outside the house, in climates where the temperature drops to -20 degrees C in winter.
Switch to English registration. Phone or email. Another's computer. My Rich stays in the courtyard of a private house all day and spends the night in the house on the veranda.
When kept outside, the berries lose a lot of heat. If a dog is kept outdoors for a long time without moving, it can catch a cold or even frostbite. Therefore, in a wooden enclosure, preferably a log house, you need to make an insulated booth with thick walls with a cloth curtain. Place hay and straw under the roof in the hut. Jagd makes a nest in it and calmly tolerates low temperatures.
When kept outside, the food should be plentiful; it is advisable to feed the dogs twice a day, morning and evening. Feed cottages should be 1.5 times larger in volume than in warm weather. In hot weather, in summer, dogs should be kept in the shade, completely excluding the sun. In the absence of wind and high humidity in the sun, heat stroke can occur.
The hunter should know that his pet's resistance to many diseases depends on where he is kept. Dogs kept in an apartment are more sensitive to cold and colds.
Long-term observations of dog breeders have shown that dogs kept outdoors, with the same feeding, live no less than those kept indoors. Despite the fact that Jagd Terriers are very resistant to unfavorable environmental conditions and quickly adapt to new climatic conditions, the hunter should always take into account that sudden changes in living conditions and exposure to unfavorable factors are dangerous for Jagd Terriers.
You should always strive, if possible, to protect your pet from strong sun, cold and other unfavorable factors.
Jagd terriers should be accustomed to new, sharply different living conditions gradually. When keeping a yagda in an apartment, it is given a specific place for rest and sleep.
This place should be away from heating radiators, stoves, doors, and not in a draft. As a rule, the new family member is placed in the quietest corner of the corridor. The Jagdterrier should not be placed in the kitchen. A small thick rug is placed on the floor. It protects well from cold floors and is easy to clean. There are recommendations to sew mattresses for dogs and stuff them with straw or something else. From practice, it should be recognized that these mattresses are less hygienic and pamper dogs.
It is very important from the very beginning to require your pet to know his place in the apartment, so that he spends most of his time there.
With frequent and constant repetition of this requirement and compliance with its implementation by yagd, the dog gets used to its place, and in the future it itself takes it. The hunter should always remember that the place allocated to the pet in the apartment is his possession and he has the exclusive right to it. If the owner has not yet understood this, then the yagd will quickly explain this to him by grabbing the hand or another part of the body.
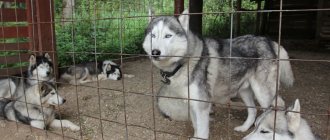
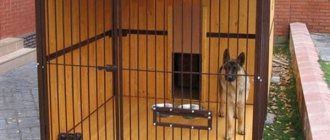
In individual homes, Jagdterriers are best kept outside the walls of the house. In the yard, in the garden, it is advisable to build an aviary, and if you are keeping several berries, a small kennel yard. Keeping dogs outside the walls of the house, especially puppies, promotes good development of both the puppy and even the adult dog. A kennel yard should be understood as a certain space of appropriate size with all the buildings and necessary equipment.
Yagdov should never be kept on a leash or on a chain. In addition to being inhumane, this method of keeping insults proud, proud, brave dogs.
The kennel yard includes separate enclosures - wooden cabins, sheds with booths inside and paddocks. The walking area for one dog should be sq. If the territory of the yard or garden allows, it can be increased, the larger the better. Only one dog should be kept in each separate enclosure. Never place a bitch in the cold season of the year - in winter, with a male dog, or vice versa, hoping that the two of them will be warmer in the booth.
Fierce fights to the death can break out between the yagdas. The kennel is placed in a place in the yard or garden where there are no drafts and the sun illuminates it for quite a long time.
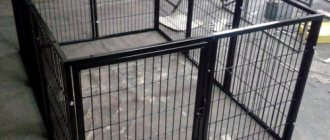
It is advisable to place the kennel on the south or east sides of the yard. In the enclosure, both in winter and summer, there should be a place where the sun's rays always penetrate. But there should also be shade where the dog can rest on a hot afternoon. It is advisable to make the cabin from wood, and the fencing of the enclosure-walk is made of steel mesh chain-link on iron posts. It must be borne in mind that Jagdterriers, like all other dogs, are capable of digging the ground well.
Therefore, it is necessary to provide for the possibility of eliminating undermining under the mesh. The ground in the paddock should be compacted with crushed stone, and concrete should be poured along the mesh. The booth is made from edged boards. The walls are made double, the gap is filled with heat-insulating materials, but in no case with glass wool.
Straw chaff is suitable for this purpose. It is advisable to make the roof of the booth single-pitched and removable for cleaning and replacing the bedding. The booth is installed on wooden blocks, raised above the floor surface by cm. It is advisable to make the opening into the booth round, slightly larger than the chest volume of the Jagdterrier. On the pitched roof, the yagda booths are laid out to rest in warm weather. This is done so that the puppies get used to life underground.
The floor in shed cabins can be made of thick, well-fitted boards sloping towards the entrance.
Sizes depending on breed:
- Small breeds, the height at the withers of which does not exceed 40-45 cm (Australian terrier, border terrier, dachshund, and other small breeds require dimensions 70 * 55 with a height of 60 cm
. - Spaniel, husky, sharpei, rottweiler and, whose height reaches 55-65 cm. In this case you will need: 120 * 75 and height - 80 cm.
- For large breeds (Newfoundland, Great Dane, Mastiff, St. Bernard, Caucasian Shepherd) above 70 cm, the dimensions of the booth should be at least 140 * 100 with a height of 95 cm.
For summer countryside keeping a dog of any breed, the best option would be.
Approximate drawing of the booth
So, we have decided on the dimensions and can proceed directly to construction. For convenience, it is recommended to draw a drawing on which the dimensions should be signed.
Also at this stage we determine where the inlet hole will be located: in the center or closer to the edge. The advantage of the opening being shifted relative to the center is that the dog has more space protected from the wind.
An example of a drawing of the simplest booth with dimensions.
Natural materials are chosen for construction: coniferous wood. It is convenient to use lining for lining the outer walls of the booth.
How to survive dog frosts
After the construction of the kennel is completed, it is time to think about heating the room in which the dog will spend a significant part of the time.
If the booth is built and designed correctly, without gaps, then there is no need to install an additional heating system. Insulation in the walls, floor and roof should reliably protect the animal from frost and wind.
If the size of the room is correctly calculated, the dog itself will heat the booth with its breath. For additional protection from the wind, you can curtain the hole with a warm blanket or a curtain specially made from thick material. To prevent the curtain from opening from the wind, I design pockets in it where sand-filled bags are placed. The gravity of the sand will hold the curtain in place.
Additional heating
In colder areas (for example, in the northern part of Russia), a special flexible heater or underfloor heating system can be installed in the dog house. When you may need to install additional heating:
- with an average winter air temperature of less than -30˚С
- if the size of the kennel is incorrectly calculated (for example, if the kennel is much larger than required for a dog of this size, or is built “for growth”)
- if the dog is constantly cold (short-haired dogs)
- if the booth is in a bad place (drafty, damp) and there is no way to move it or protect it additionally
When installing any heating device, you must ensure that the animal cannot reach and chew the wires.
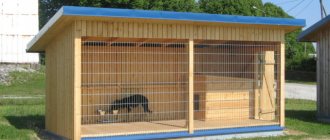
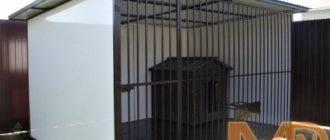
Dog house with canopy
A kennel with a canopy is suitable for large watchdogs. The canopy protects the animal from rain and snow, but at the same time allows it to calmly guard the area. The area under the canopy should be the same size as the kennel itself or a little larger so that the entire body of the animal can fit on it.
Housing with a canopy will definitely appeal to the following dog breeds:
- shepherd;
- malamute;
- husky;
- mastiff;
- Saint Bernard
We suggest you read: Stroke in a cat: symptoms, what to do, treatment, causes. Stroke in cats: there is always a chance of recovery. Stroke in cats
When making a drawing of a doghouse for a shepherd or any other large breed, be sure to take into account the canopy.
Design - for the tenant or for the owner?
The doghouse is part of a personal plot or local area, so it is necessary to give it an appropriate appearance.
The outside of the kennel can be painted with a suitable composition (for example, Pinotex), and a lantern can be made under the roof for illumination at night (the rules are the same as with heating devices).
A decorative gable roof can also perform a practical function: in the attic you can arrange storage for dog accessories: collars, leashes, toys.
So, building a doghouse with your own hands is not such a troublesome and expensive task, but the owner will be confident in its reliability and safety for the pet.
You can involve children in this activity, who will be happy to help build a house for a family friend. This will not only interest them, but also help them show their imagination: for example, stylizing a doghouse as a house and attaching a pipe or other decorative elements to the roof.
In order to build a dog house with your own hands, you first need to understand the intricacies of creating this garden building. The place for the dog's housing must be chosen correctly, and the material must be warm and cozy. In general, it’s better to sort out all the nuances of creating a doghouse with your own hands, which is what we’ll do now.
Choosing dog house sizes
The first step is to decide on the size of the dog house. To do this, we decide what size dog you have. There are 3 types of dogs: small, medium and large. Accordingly, dachshunds and similar dogs are classified as small, German shepherds as medium-sized, and Caucasian shepherds as large. Based on this classification, it is customary to make booths of the following sizes:
- For small dogs: 700*550*600 mm (where length is first and height is last)
- For medium dogs: 1200*750*800 mm
- For large dogs: 1400*1000*950 mm
The dimensions of the doghouse can be adjusted based on the dimensions of your own dog.
In order to correctly determine the size of the booth, you must adhere to this technique:
- In order to choose the correct width of the hole, measure the width of the dog’s chest and add 5-8 cm to this value.
- The ideal height of the manhole is 5 cm below the height of the dog’s withers.
- The height of the booth should be the height of the dog at the withers + 5-8 cm.
- The depth of the kennel is equal to its height (with the exception of some dog breeds that dictate their own kennel dimensions)
As mentioned earlier, the dimensions of the booth can be “moved” a little, but only to a larger value, especially if the booth is being built for a puppy.
During the construction of the booth, you need to be aware of the following points:
- The dog’s housing should be comfortable so that it can lie down, turn around or stand up.
- The inlet opening should not be narrow; on the contrary, it is better to slightly widen it for convenience
- The kennel must be lined with insulation so that the dog does not freeze in the winter.
- Walls and roof must provide reliable protection from wind and precipitation
- The material used to make the booth must be environmentally friendly so that the dog does not spoil its health while living in the booth (it is best to use wood)
- The booth must be correctly located on the backyard territory (the side should not be windy, and the dog must see everything that is happening on the territory)
- The roof can be either single-pitched or double-pitched, there is no big difference
- For convenience, make a small attic under the roof of the booth in which you can put toys for the dog, dishes and other accessories
- The hole must be built in the direction of the long wall so that the dog can more conveniently climb into the booth
After we have decided on the dimensions of the booth, we move on to sketching a drawing, with the help of which it is easier to build a booth with our own hands.
DIY yagda booth
It is necessary to build an apartment for your Jagdterrier after the correct place for installing the booth, its type and components have been selected.
Booth space. The most optimal place to install a booth is a shaded area, located in the shade of a tree or fence and with a slight elevation. This elevation will protect the booth from melt and rain water. It is not advisable to install an enclosure or booth under the roof of the owner’s house or directly under a tree, since falling icicles or snowballs can irritate the pet or cause injury to it.
A booth for a Jagdterrier is a cubic or parallelepiped-shaped structure with a pitched or gable roof. Since yagdas do not recognize the chain, the booth should be located inside the enclosure, where the dog can play with his favorite toys and stretch his muscles.
Materials and tools needed to make a dog house with your own hands
In order to make a booth with your own hands, you need to use environmentally friendly materials, it is best to use wood (conifers). For construction, 12.5 mm thick lining (external cladding), as well as fiberboard, chipboard, plywood and floorboard are used. You will also need bars in sizes 100*100, 40*40 and 100*50. To create external corners and decorate the booth, a wooden corner is used, as well as a symmetrical plinth and decorative slats.
To insulate the booth (and this must be done), glassine, polystyrene foam and mineral wool are used. The roofing material for the booth will be galvanized corrugated sheet or slate. It is not recommended to use bitumen shingles and roofing felt for these purposes, because out of habit, the dog will chew them and thereby harm its health.
The tools that we will need to make a booth with our own hands are the following:
- Shovel
- Hammer
- Pencil
- Building level
- Roulette
- Hacksaw or circular saw
- Galvanized nails
- Paint (pinotex)
- Drying oil
- Antiseptic impregnation for wood
We are building an enclosure for a dog ourselves: what needs to be taken into account and how to do it?
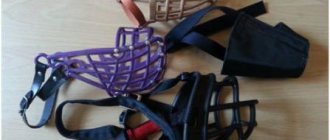
Tightening strap for securing cargo: high-quality securing and delivery of any cargo! A non-sparking tool or how to protect yourself when repairing a gas pipeline?
Gasoline grinder: what to look for when buying and working with a tool? Rail cutter: features of design and operation of the tool. Cable clamp: buy ready-made or make it yourself? How to make a grill from a gas cylinder? Work order and photos of finished projects. Popular on the site. In multi-storey buildings, there are quite often situations when neighbors living above flooded the residents living below.
In fact, such a situation is quite difficult and complex. Plaster and masonry mixtures.
How to make a doghouse: step-by-step instructions
First of all, cut the boards. If the roof is pitched, the back wall of the booth should be shorter than the front, so that the rainwater slopes behind the booth.
We prepare wooden blocks for the frame of the booth. It is better to make the length of the bars with a small margin.
We put together the frame of the booth in accordance with the previously prepared drawing
We cover the frame of the booth from the inside with boards; it is recommended to immediately build a roof. To prevent the dog from getting hurt, the boards must be sanded.
We build a hole in the front wall of the booth, the ends of which also need to be processed
Now we move on to insulation: the floors, walls and roof must be insulated with foam plastic, on top of which the outer wall made of boards will be fixed.
After this, we sheathe the outer part of the booth using the material of your choice (fibreboard, chipboard, lining, etc.). If material resources allow, it is recommended to use wood siding.
Next, we proceed to sealing the cracks and seams so that wind and precipitation do not worsen the dog’s cozy location. You can use slats, baseboards, glazing beads, etc. as a sealant, the main thing is that they are made of wood.
After sealing, we move on to the roofing. For this, it is best to use slate sheets.
Well, in the end, all that remains is to treat the finished doghouse with an antiseptic and install the building on bricks or a pallet so that the floor does not rot on the damp ground
That's all, the do-it-yourself dog house is ready! All that remains is to paint it and install it in a suitable place!
Before getting a dog, the owner should decide where the dog will live. In the city, most pets live in apartments, and in country houses, the animal (especially if the breed is medium or large in size) is given a corner in the yard, where they place a ready-made booth or build it from scrap materials.
The construction of a booth does not require special skills and takes no more than one day if you have the materials and know some of the features.
Step-by-step instructions for making your own dog house
First they make a drawing. The dimensions in the drawing must correspond to the actual dimensions of the kennel. For step-by-step instructions, a drawing of a booth for a dachshund or Jagd terrier was selected. These breeds belong to a small group. For medium and large breeds, sizes are increased according to the table.
Step-by-step instruction:
- The base measures 90 by 70 cm. Take 2 beams 70 cm long and attach boards 90 cm long to them.
- Niche for insulation. You need a beam with a cross section of 50 by 50 cm. Cut it into 2 bars 90 cm long and two 60 cm long. The bars are fixed to the base.
- Insulating a dog house with your own hands. Cut out the insulation and attach it tightly to the base.
- Floor. The comfort of the animal depends on its quality. You will need boards 90 cm long; they are secured with self-tapping screws at the base.
- Side walls. Two side walls are needed. For walls, the dimensions of the boards are 65 cm and the beams are 40 cm. The walls are fixed at the base of the floor using corners and self-tapping screws.
- Front and back walls. You will need boards 70 cm long and bars 40 cm long. Leave room for a crawl space on the front wall. The animal must pass freely through the hole.
- Fastening all walls.
- Insulation on the walls of the booth.
- Internal wall lining.
- Fastening the roof to the walls.
- Fastening the bars under the insulation.
- The insulation is well leveled and secured at the base.
- Covering the ends of the roof with boards. A pitched roof is made at a slope so that water runs off when it rains. A gable roof is suitable for large dog breeds. It will increase the internal dimensions of the booth for a Malamute, Alabai, Bulldog, Rottweiler or other breed.
- Upholstery of roof insulation boards.
- Covering the roof with roofing material.
After completing the work, carefully inspect the box and remove everything unnecessary from it. There should be no sharp or piercing objects left, especially if the booth is for a puppy and not for an adult dog.
Design and dimensions
To build a kennel, you need to know its future dimensions, the material for the kennel itself and insulation, the location and size of the entrance.
First of all, you should decide on the dimensions of the dog’s home. They depend on the size of your dog. The height of the kennel to the ceiling is equal to the height of an adult dog, to which 10 cm is added. The width is determined by measuring the width of the dog’s chest and adding 10 cm to it, the depth by adding 10-20 cm to the length of the body without the tail.
In general, the kennel should be spacious enough for the dog to turn around and stretch out its paws, but not too bulky, otherwise it will be difficult for the dog to heat it.
If you are making a kennel for a small puppy, then you have to use reference materials. For different breeds, there are tables of recommended kennel dimensions (width/length/height):
- For large breeds (great Danes, mastiffs) – 120*100*100 cm
- For medium breeds (huskies, setters, labradors) – 100*80*100 cm.
- For small breeds (dachshunds) – 80*60*80 cm.
Please note that the dimensions shown here are from the inside; if you plan to make interior lining, then add the wall thickness to all measurements.
As for the device, they use two options: one room, or divide it into a “vestibule” and the main one. But dogs love to watch what is happening around them, and the vestibule only gets in the way.
The booth is placed on a plank platform raised above the ground. Part of the flooring can extend beyond the booth, forming a bed over which it is good to make a canopy - dogs love to spend time outside.
To make it convenient to disinfect and clean, small booths have a removable roof or a folding one. Over time, organic particles and fur accumulate in the kennel and fleas often appear, so regular cleaning is necessary.
Many dogs like to lie on the roof, so it is better to make it lean, with a slight slope back to drain water.
A gable roof only increases the internal volume of the booth, which makes heating difficult, without bringing any benefit to the animal.
If you still want to make the roof a “house,” then first you should build a flat ceiling so that the dog does not freeze. The roof can be covered with bitumen shingles, roofing felt, or metal tiles.
Booth mounting
To build walls and floors, you will need pine beams 5-10 centimeters thick. To protect the dog’s shelter from excess dampness, glassine or roofing material is attached to the beams. Boards are nailed to the resulting structure to form the floor. The appearance of knots, cracks, sharp chips and other flaws in the boards that can injure the dog, contribute to drafts and water ingress is unacceptable.
The walls for the home are made double, with a layer of insulation passed between the layers of boards. It is better to use a coniferous tree. The boards must first be sanded and made absolutely smooth. The boards fit tightly, avoiding gaps in the walls. The inside of the kennel is covered with plywood or clapboard. A layer of foam or felt is laid between the boards.
The filler is securely hidden inside so that the dog does not get to it and begin to chew or play with the contents.
The entrance to the home is closed for the winter with a curtain made of felt or a thick blanket. The roof for the kennel is preferably single-pitched, slightly sloping back. Then in the summer the pet will lie on the roof of the house. If the roof is hinged on one side, this simple action will make cleaning the dog's home easier.
Material for the booth itself and insulation
The booth can be built from almost any available material; traditionally wood or particle boards are used. The best craftsmanship is coniferous wood; it retains heat better in the cold season.
Brick and concrete get very hot in hot weather and cool quickly in cold weather; plywood and plastic are short-lived.
Usually a frame is built from timber, which is then sheathed with the selected material. The main condition when building a roof and walls is that there are no gaps; drafts are dangerous for dogs. The floor, walls and ceiling must be smooth, without protruding knots, screws or nails.
Note!
Any booth should be insulated. The following materials are suitable as insulation:
- Felt
- Foam rubber
- Expanded clay
- Penoplex (foam plastic)
- Mineral wool
In the latter case, steam and waterproofing are laid to completely eliminate the possibility of fiber particles getting into the kennel - they cause allergies in dogs. Any insulation should not protrude over the inner lining.
In cold weather, they put straw on the floor (precisely straw, since hay generates dust, and sawdust cakes and quickly becomes damp), the dog itself will make a “nest” in it, and throw away the excess.
During the winter, the litter should be replaced two or three times; in warm weather, it should be removed.
What material is best to make a booth from?
The owner of the animal himself determines the size of the structure and its location. First, the material for construction is selected. Next, calculate the need for building materials.
You need to decide which materials are suitable for creating a pet’s home and which are not:
- Materials coated with varnish or paint heat up in the sun and emit an unpleasant odor. Can cause allergies in animals.
- Metal structures cause discomfort to the animal in hot and cold seasons. The metal heats up in the sun and the kennel will be too hot. In winter, your pet will be very cold in such housing.
- You should not make a slate roof. This material is harmful to the health of both humans and animals.
- It is better to avoid insulation with polystyrene foam, polyurethane or various types of compressed wool. These materials emit odors, which reduces your pet’s sense of smell and reduces allergies.
- A box made of pressed wooden panels quickly loses strength, and in winter it may even fall apart.
To make housing for dogs, boards made from coniferous trees are best suited: pine, spruce, cedar. To insulate the kennel, natural materials are used that will not cause allergies in the animal. The roof is made of metal or ondulin. A mattress filled with sawdust or straw is placed on the floor; the animal will sleep comfortably and warmly on such a bedding.
Laz
This also has its own characteristics. The height of the opening is determined by adding 5 cm to the height of the animal, the width depends on the width of the dog’s chest - measure it and also add 5-6 cm. Make it wider - it will be cold, narrower - it’s uncomfortable for the dog to climb.
Note!
The opening is not cut in the center of the wall, but is shifted to one of the corners. Your dog will be able to hide from precipitation and wind behind the wall. For a small puppy, a small opening is made, which is expanded as it grows.
The entrance to the kennel is hung with two sheets of coarse fabric, cut into wide strips. The fabric is secured in the opening, moving the slits, so the dog can enter freely, and the wind will not blow inside.
A threshold 10-15 cm high is nailed to the bottom of the opening to prevent snow from getting inside and to prevent the dog from throwing out the bedding.
The booth is located on an elevated place, well protected from the sun and wind, but giving a good view of the area from the entrance.
How to build a dog house
When building a doghouse for your pet, choose a suitable location. Then you will need to take care of arrangement and habitation.
- The most suitable place for a dog kennel is considered to be a place in the shade of a thick tree or a solid fence and located on some hill. It is able to protect the dog’s home from melt water and rain.
- It is not recommended to install a kennel under the edge of the roof of a house or directly under the crown of a tree - icicles or wet snow flakes fall from the roof or branches, and if they fall on the pet, they will cause serious injury.
- The booth is built in the shape of a cube or rectangle and has a single or gable roof.
- To build a kennel you will need wooden beams and boards; for the roof you will need soft tiles or slate. It is possible to insulate walls using polystyrene foam and felt layers. It is recommended to protect against dampness using moisture-reflecting materials.
- The size of the kennel is not made too large so that the dog can warm the interior space with its own body. The entrance to the kennel is curtained with felt.
- The dimensions of the entrance hole are made small - 10 centimeters less than the highest point of the dog's withers, the width is slightly wider than the dog's chest.
Insulated kennel option
In this case, a doghouse was built from improvised materials, with a small canopy on the side and two blank walls.
Note!
Two wide wooden shields were made to size on four timber supports. Floor boards were laid on this platform. Legs are necessary to protect the floor from moisture.
The bars were attached to the corners of the structure. There were six pieces in total: four bars for the booth itself and two for the outer windproof walls.
Then they built the inner lining, attached 7 cm of Penoplex to it and covered the outside with boards. To prevent water from flowing between the skins, a block was nailed on top.
Whole boards were used for the external cladding of the wall adjacent to the wind barrier wall. So the whole structure becomes more rigid.
The construction of the roof took the longest time. They didn’t want to make it completely flat, so first they built an insulated shield, to which they nailed a rounded cover made of stacked slats.
The roof is not sloped, but due to its shape, water will still drain. To protect against moisture, a film was placed under the boards.
Diagram of a kennel for a large breed of dog (Caucasian)
The version of the booth shown in the photo below was built for a medium-sized dog, but according to the drawings of a booth intended for a Caucasian.
They were going to place the kennel near the bathhouse and wanted to make it match the style. For the booth, the remaining materials from the construction of the bathhouse itself were used.
Adjustments were made to the original design: a door was made at the back for cleaning, and a window was cut into the side wall for viewing.
First, they built and painted a wooden platform from logs that had previously been planed and nailed together. Then we started assembling the booth itself. The structure was completely assembled in the workshop and then taken out and installed in the desired place near the bathhouse.
The lower crown was laid intact - it supports the structure and forms a threshold. Then the timber was cut according to the planned pattern.
Since the owners planned to build the roof in the shape of a “house”, like on a bathhouse, they built a flat ceiling from a thick sheet of plywood. He was laid on a dowel cut into the timber. Then the shields were installed and secured on top.
They were assembled without rafter mesh, since the roof was decorative. They simply nailed the panels together, covered them with soft tiles left over from the bathhouse, and covered the gables with boards.
The booth is ready. Construction and installation took half a day.